Quick Start
CC Flute consists of Main screen and several sub-screens: Settings, Utilities, Play-Along, and User Guide (this document).
Note: Explanations related to sub-screens is applied if you have purchased Extra Features, Extra Features Trial or paid version.
Main Screen
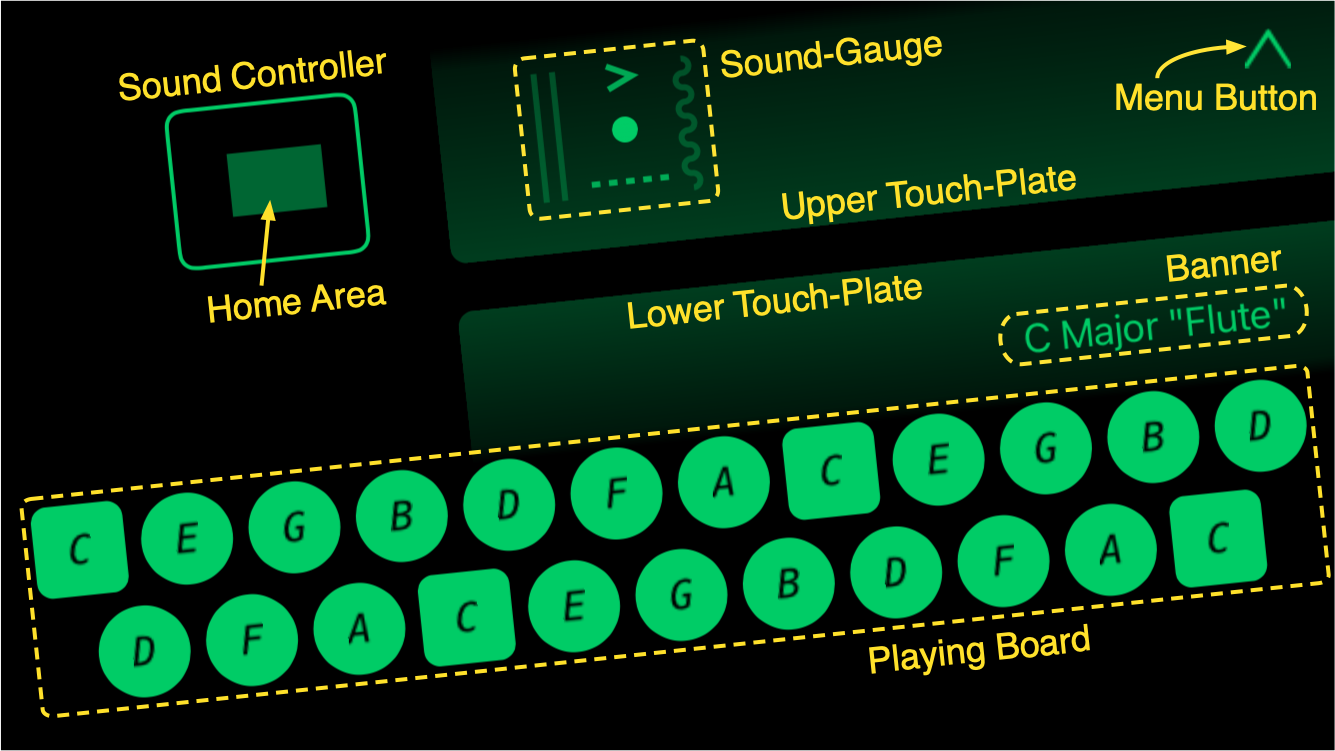
The Main screen is the screen for performing music, and configured as follows.
How to Hold
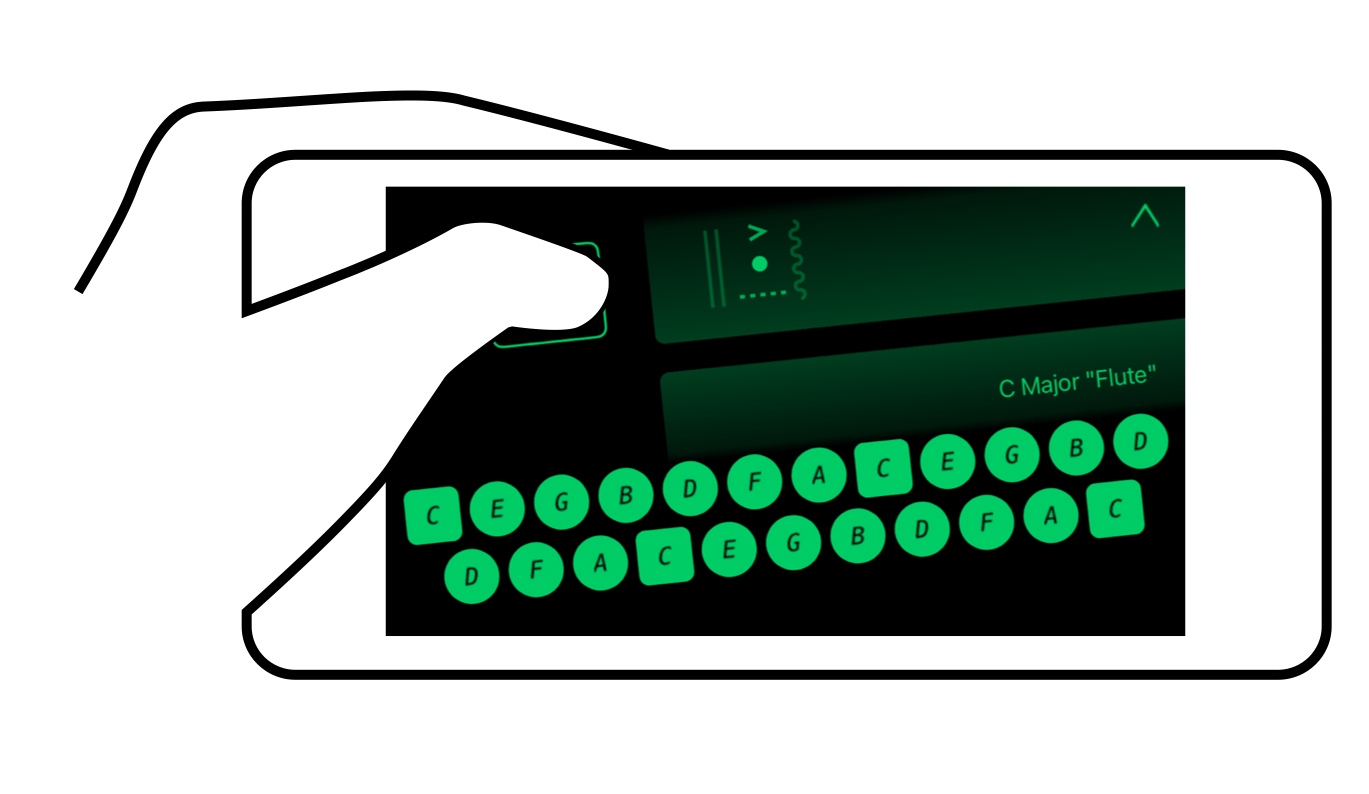 Place the device horizontally in your left palm.
Put your left thumb on the center of the home area in the Sound Controller.
It's also a good idea to place your right thumb or left little finger at the bottom of the device to support it.
Note: Mind the direction of the device so that your palm does not cover the device sound output.
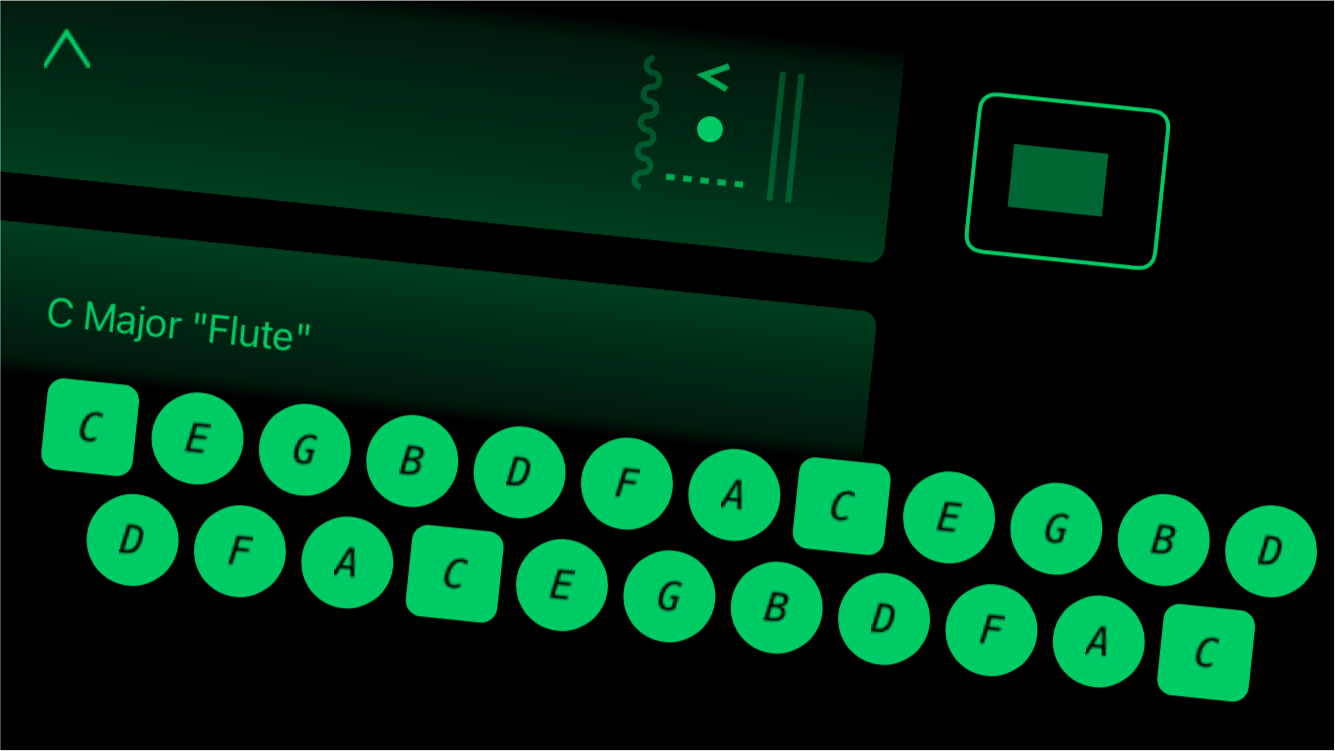 Left-handed compatible
The Main screen layout can be flipped for left-handed users with the "Left-Handed" switch in the "CC Flute" section of the device settings app.
Settings > CC Flute > Left-Handed
Playing Board
Playing Board is a button-bar area with multiple buttons that make sounds when touched.
Each button is laid out along a certain scale in a zigzag pattern from left to right in order from the lowest note.
The layout is usually according to the major scale, but you can also choose from several layouts along the minor, blues scale, and so on.
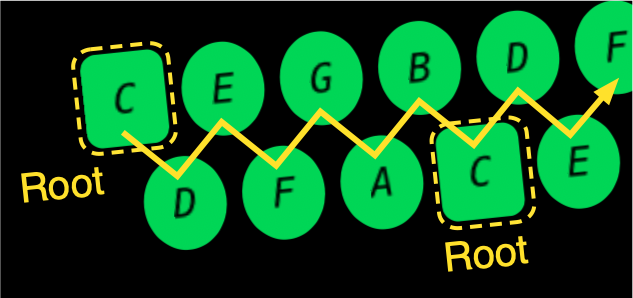 The buttons assigned to the root of the scale are rounded rectangles.
The letters and numbers in each button indicate the note assigned to that button, and its notation can be selected from note names, intervals, solfege notation (doremi), and so on.
In addition, the button-bar can be shifted in 3 steps, high and low, to match the actual playing range.
You can make these settings and changes on the settings screen.
Details are described in the "Settings" chapter of the User Guide.
The button-bar supports touches up to two fingers.
By default, "Auto Legato" is on, which means that the later touch always takes priority (if the later touch is released before the earlier touch, it will revert to the earlier touch).
This allows for smooth legato even when playing jumping between distant buttons.
The style of the playing board can be changed to keyboard in the settings screen.
For more information, including other features, please refer to the "Utilities" and "Settings" chapters in the User Guide.
Sound Controller
Attack and pitch of the sound will change depending on the position of your finger on the sound controller.
The dimly colored rectangular area within the controller is the home area, where pitch does not change depending on the touch position.
 Sound-Gauge is a gadget for checking the position of the touch without being disturbed by your finger.
The dot in the sound-gauge acts as a cursor to indicate the touch position. When you release the touch, the cursor returns to its default position.
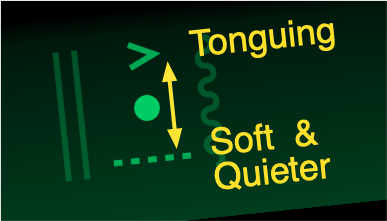 Moving the touch up from the center will make the sound have a stronger attack, as if you were playing with "tonguing".
Conversely, moving the touch down will make the attack softer, and moving it further below the bottom line will make the sound quieter.
 Moving your touch left from the home area will lower the pitch of the sound by up to 2 semitones (200 cents).
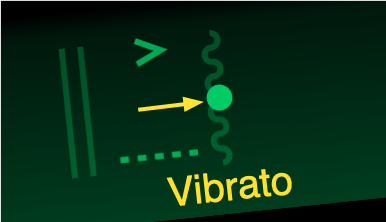 Moving your finger to the right from the home area will start the vibrato effect, and the further you move your finger to the right, the stronger the effect will become. (The vibrato cycle can be changed on the Utility screen.)
Touch-Plates
The two gradually darker areas are the upper and lower touch plates that act as semitone up and down switches.
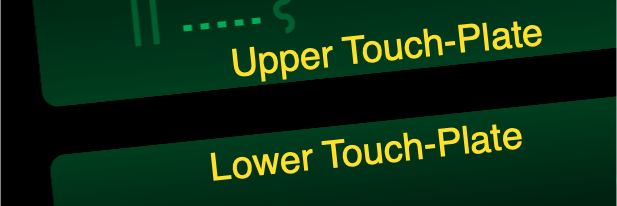
Touching the upper touch plate raises the pitch by a semitone, and touching the lower touch plate lowers the pitch by a semitone.
At the same time, a "#" or "♭" will appear on the right side of the sound gauge.
Banner
Displays the settings currently being applied: pitch, key, layout, sound, etc.
 The details are described in the "Settings" chapter of the User Guide.
Menu
You can select the key, layout, sound, etc. from the settings screen called up from the menu. In addition, you can enjoy this instrument in more ways by using various features accessed from the menu.
Tap the "Menu" button in the top right to display the menu.
The menu will disappear if you touch anywhere on the screen.
Note: If you have not purchased Extra Features or Extra Features Trial, only the "Utility" and "User Guide" icons will be displayed.
![]()
Tapping on a menu icon will bring up a sub-screen or user guide page related to the icon.
Note: To prevent unexpected operation, release all other touches on the screen when tapping the menu.
| Icon | Sub-Screens | What you can do |
|---|---|---|
| Utilities | Adjust reverb, vibrato and other effects, special features, and appearance. | |
| Settings | Set musical characteristics: pitch, key, layout, sound, etc. | |
| Play-Along | Operate the play-along player to playback songs from your music library. | |
| User Guide | Open the User Guide page (this document). | |
User Guide
User Guide explains all of the features of this application that organized by relevant tab-bar screen.
Tapping the ![]() icon in the Menu will invoke the first page of the user guide: "Quick Start"--this page.
icon in the Menu will invoke the first page of the user guide: "Quick Start"--this page.
You can navigate through the user guide by the navigation bar at the bottom.
To return to the main screen, tap the "Done" at the left end of the navigation bar.
If you have any questions or concerns, feel free to contact us at support@chord-city.com