Utilities Screen
Utilities screen allows you to adjust various sound effects, special features and appearances. (the screen for each item can be scrolled up and down)
To close the utilities screen, tap the "Done" button at the bottom left.
Tip: On this screen, the main screen responds as usual, so you can make adjustments while actually checking the degree of each effect.
This chapter includes the following sections:
- Attenuate
- Expression
- Reverb
- Airy Noise
- Vibrato
- Overlap
- Smart Chord
- Bending
- Color Palette
- Adjust the Controller
Attenuate
The selector labeled "Attenuate" attenuates the instrument's sound by the selected amount (in decibels) without affecting the device's volume setting. This is especially useful when you want to play at a low volume, or match to the play-along playback volume; normally select "0".
Expression
You can express the dynamics of the sound by tilting the device.
How the loud volume changes according to the tilt of the device can be selected with the "Expression" selector described below.
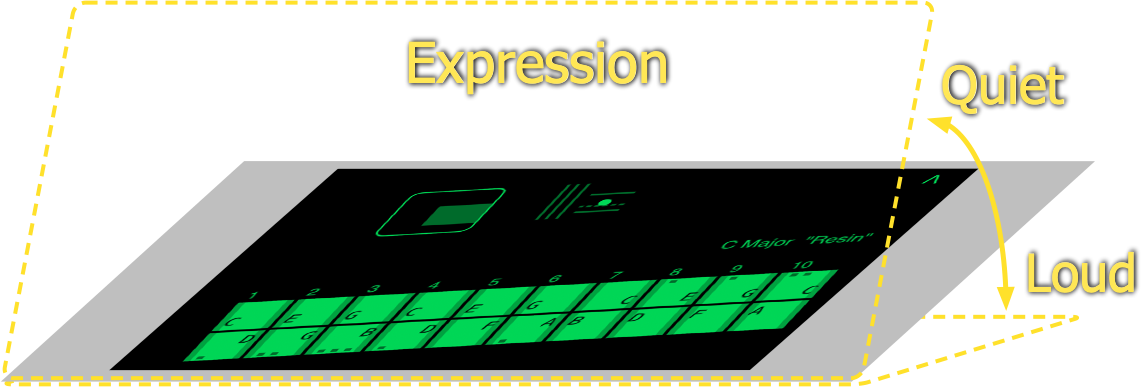
Tip: Selecting "Off" will stop the device-motion sensing and may help to reduce a power consumption.
| Button | Behavior |
|---|---|
| No volume change occurs. | |
| The volume reduces linearly according to the tilt angle. | |
| The volume drops in areas where the tilt angle is large. | |
Reverb
"Reverb" slider changes amount of the reverb effect to the sound.
You can bypass the reverb effect moving the slider to the left end.
Airy Noise
"Airy Noise" slider adjusts the volume of the airy noise that is characteristic of harmonica playing.
If you want no airy noise, move the slider to the left end.
Vibrato
Shaking the touch finely to the left and right on the Sound-Grid causes vibrato in the sound.

"Sensitivity" slider changes the sensitivity of this vibrato effect.
If you want no vibrato, move the slider to the left end.
Overlap
The Overlap is a dim zone between the adjacent grids on the same side of the upper or lower of the Sound-Grid.
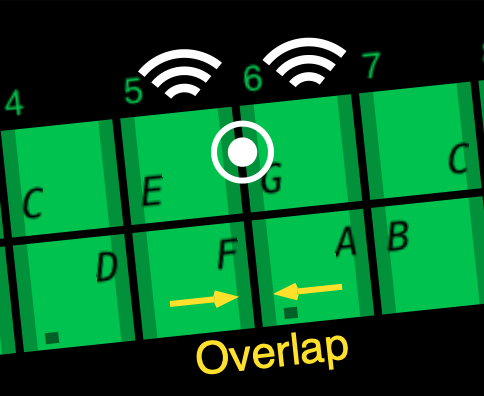
When you touch the overlap, the sounds in both grids will sound together as double note, creating a harmonica-like effect.
The width of the overlap can be changed with "Overlap" slider.
Tip: You can get a train horn sound with bending the minor 3rd intervals double notes (e.g. lower side of the 3rd and 4th grid of Major tuning).
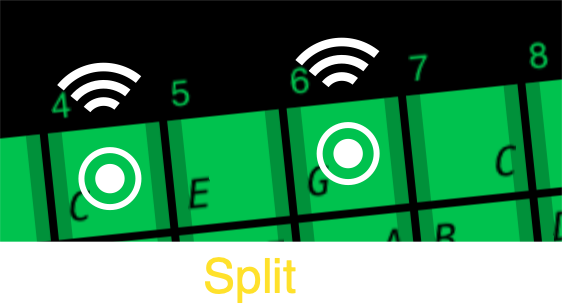
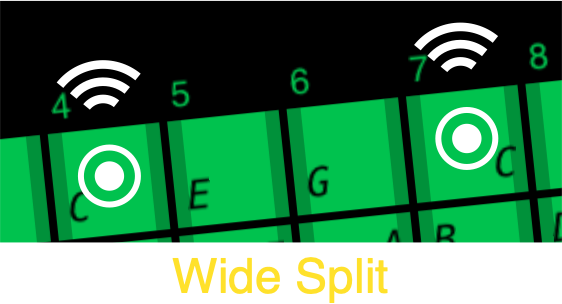
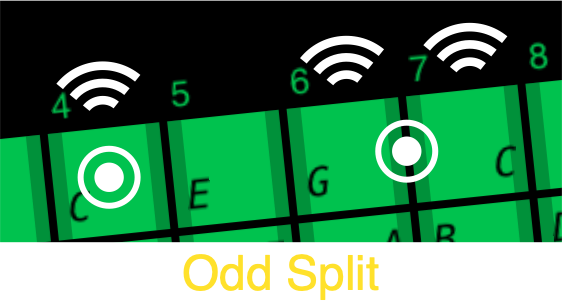
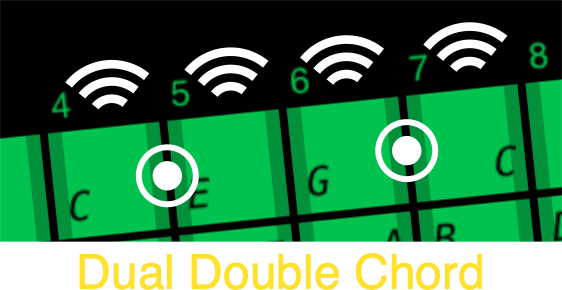
Multi Notes
The Sound-Grid supports up to two independent touches.
You can make various multi notes including smart chord (explained further on) by combining with the double notes feature;
it's even possible to sound the blow note and draw note simultaneously (not possible with a real harmonica).
Some examples are illustrated below.
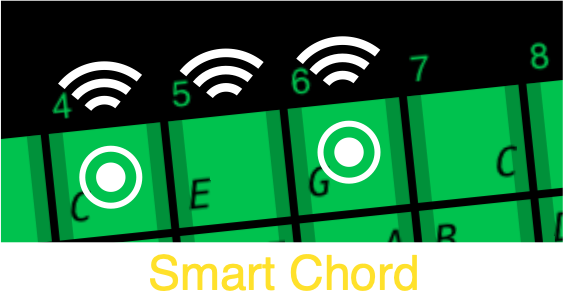
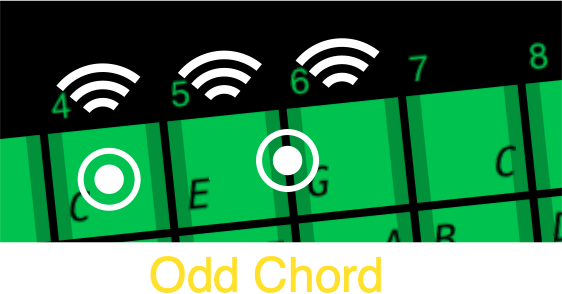
Smart Chord
The Smart Chord switch turns the Smart Chord feature on or off.

When the "Smart Chord" is active, touching two grids of the Sound-Grid that sandwich one grid sounds the notes of these three grids.
For example, if you touch the “C” and “G” on the upper side, a note of the "E" will be also sounded and it becomes "C" chord.
Bending
Moving your touch left from the home area will move the cursor left, and moving out of the home area will cause bending (lowering the pitch of the sound) depending on its position.
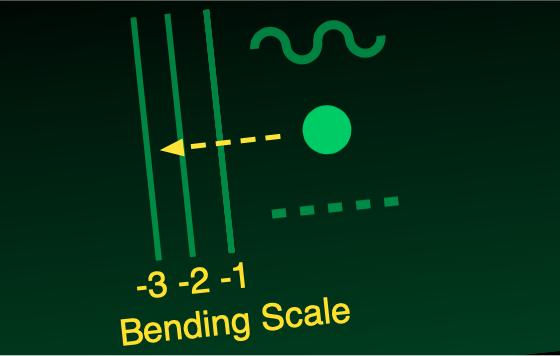 The three vertical lines on the gauge are the bending scales, indicating where the pitch drops by 1 semitone, 2 semitones, and 3 semitones, respectively.
![]() However, the maximum value that can actually be bent varies depending on each grid of the sound grid, just like on a real harmonica.
However, the maximum value that can actually be bent varies depending on each grid of the sound grid, just like on a real harmonica.
The maximum possible bend is the number of dots on the edge of each grid multiplied by 1 semitone.
Even if you perform a full bend (move the sound controller all the way to the left) and the cursor points down three semitones, the sound of each grid can only be bent down to the limit set there.
Free Bend
The "Free Bend" switch turns the free bend function on or off.
![]() If you don't mind that the bending behavior is not the same as on a real harmonica, you can set the bend limit to the maximum (3 semitones) for all grids of the sound grid by this feature.
If you don't mind that the bending behavior is not the same as on a real harmonica, you can set the bend limit to the maximum (3 semitones) for all grids of the sound grid by this feature.
Accur. Bend
The "Accur. Bend" switch turns on/off a feature that supports accurate bending while you play.
When accurate bending is ON:
- The Sound Gauge's bending scale will only display one step.
- Placing one or two fingers on the touch plate will increase the scale by two or three steps accordingly.
- The bending limit for each grid will be the smaller of the limit set for that grid or the limit indicated by the scale.
| Touch Plate | Bending Scale | Bend Range |
|---|---|---|
| No touch |  | 1 semitone |
| 1 finger touch |  | 2 semitones |
| 2 finger touch |  | 3 semitones |
This is useful for accurate bending at the grid having a wide bendable range.
For example, it is not easy to accurately perform a two semitone bend on a grid with a three semitone bend limit, but with Accur. Bend turn on, you can do this by placing 1 finger on the plate and performing a full bend.
Note: When a chromatic tuning such as "Solo" is selected as the tuning setting, the "Accur. Bend" function is disabled because the touch plate is used as a slide controller.
Color Palette
Tapping "Color Palette" button ![]() will display the color palette dialog, allowing you to select and change the drawing color of the main screen.
will display the color palette dialog, allowing you to select and change the drawing color of the main screen.
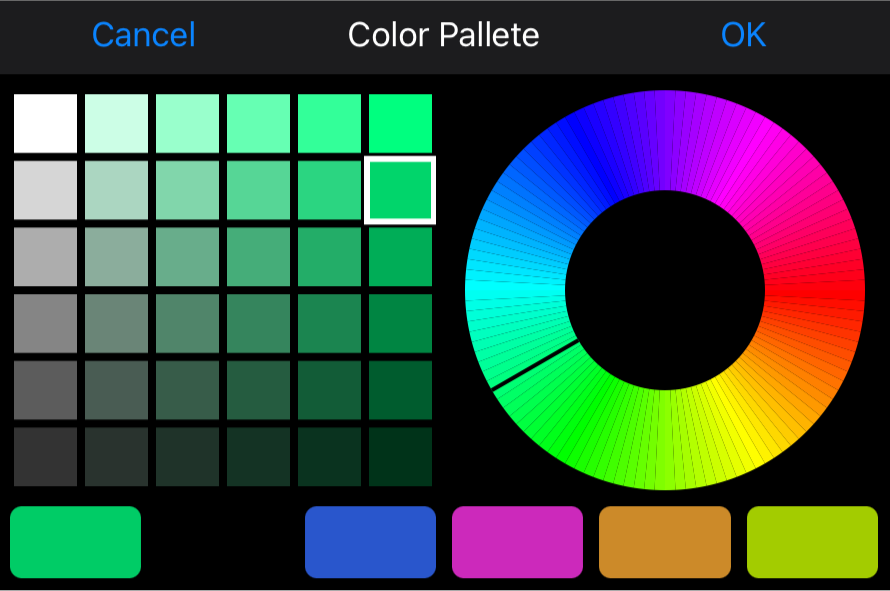
- You can change the hue, brightness, and saturation using the color wheel on the right and the color grid on the left.
- Tapping the color selectors at the bottom will change the palette to the colors saved there.
- The leftmost selector is the default color (sea green).
- By long press one of the four color selectors on the right, a confirmation dialog will appear and you can save the palette color there.
- To close the dialog, tap "OK" if you want to use the palette color as the drawing color on the main screen, otherwise tap "Cancel".
Adjust the Controller
You can adjust the location and size of the sound controller to make it easier to play.
Controller Location
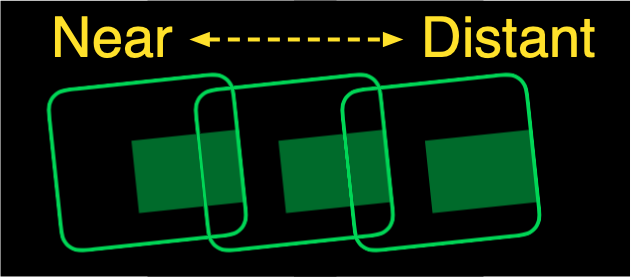 By tapping
 ![]() or
or ![]() on the right side, you can move the location of the controller left or right;
the number shows the current location. (1: closest, 9: farthest)
on the right side, you can move the location of the controller left or right;
the number shows the current location. (1: closest, 9: farthest)
Controller Size
 You can choose from large, medium, or small using the size selector on the right.